Blenders are a staple in many kitchens, loved for their versatility and convenience. From smoothies to soups, they can whip up a variety of delicious treats in seconds. However, many people dread the task of cleaning them afterward. It’s often seen as a tedious chore, and if not done correctly, can lead to lingering odors, stains, and even damage to the blender.
In this article, we’ll explore the right way to clean your blender to ensure it remains in top condition. By following these steps, you can extend the life of your appliance and maintain hygiene, all while making the process less of a hassle. Let’s dive into the details and correct the common mistakes made in blender cleaning.
1. The Importance of Proper Blender Cleaning
Cleaning your blender properly is crucial not only for hygiene but also for the longevity of the appliance. Residue from blended foods can harbor bacteria, leading to unpleasant odors and potential health hazards. This is especially true for blenders used for raw foods, like greens and protein shakes. The buildup of food particles can also dull the blades and cloud the jar, affecting performance and aesthetics over time.
Proper cleaning techniques help to maintain the sharpness of the blades and the clarity of the jar. This ensures that your smoothies remain smooth and your soups perfectly blended. Furthermore, by keeping your blender clean, you can avoid cross-contamination of flavors, ensuring that your morning smoothie doesn’t have hints of last night’s garlic sauce.
2. Why You Should Never Scrub the Blades
Scrubbing the blades of your blender is a common mistake that can lead to dullness and damage. The blades are designed to be sharp and precise, and aggressive scrubbing can wear them down over time. Additionally, attempting to clean the blades manually with a sponge or brush can be dangerous, leading to potential cuts and injuries.
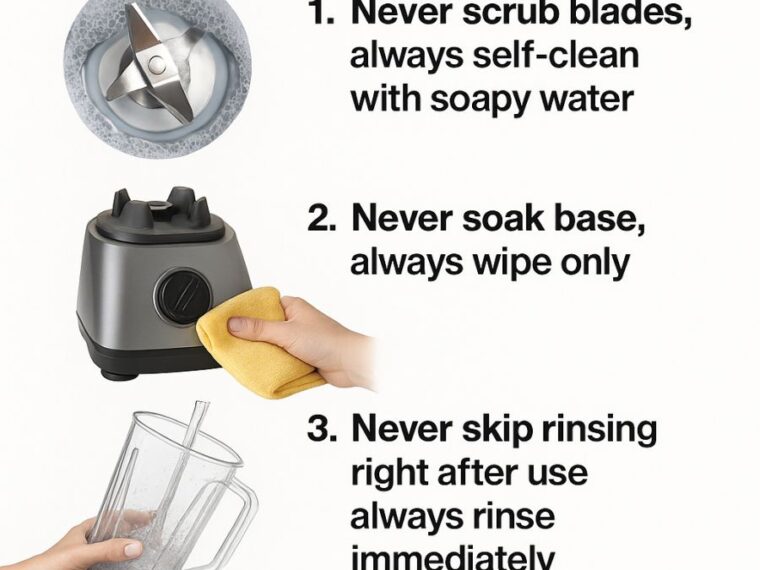
Instead of scrubbing, let the blender do the hard work. Use the self-cleaning method with soapy water to effectively clean the blades without compromising their sharpness. This not only ensures a thorough clean but also keeps you safe from harm.
3. Self-Cleaning with Soapy Water: The Right Way
The self-cleaning method is a quick and efficient way to clean your blender without much effort. Start by filling the blender jar with warm water, about halfway. Add a few drops of dish soap and secure the lid tightly. Turn the blender on and let it run on high speed for about 30 seconds. This process allows the soapy water to reach all areas of the jar and blades, dislodging any stuck-on food particles.
After the self-cleaning cycle, rinse the jar thoroughly with clean water to remove any soap residue. This method is effective in maintaining the sharpness of the blades and the cleanliness of the jar, making it an essential step in your blender-cleaning routine.
4. Immediate Rinsing: A Crucial First Step
As soon as you finish using your blender, it’s important to rinse it immediately with warm water. This prevents food particles from drying and sticking to the sides and blades, making the cleaning process much easier later on. Immediate rinsing is especially crucial if you’ve blended sticky or thick ingredients like peanut butter or smoothies with banana.
Simply fill the jar with warm water, swirl it around, and pour it out to remove the initial residue. This first step can save you a lot of scrubbing time and effort, making the subsequent cleaning stages more efficient.
5. Avoiding the Dishwasher: Hand Washing the Plastic Jar
Although it might be tempting to toss the blender jar into the dishwasher, doing so can lead to clouding and warping, especially if the jar is made of plastic. The high heat and harsh detergents in dishwashers can degrade the material over time, affecting both the appearance and functionality of the jar.
Instead, opt for hand washing with warm soapy water. Use a soft sponge or cloth to gently clean the inside and outside of the jar, paying particular attention to the edges and corners. Rinse thoroughly and dry immediately to prevent water spots and maintain the jar’s clarity.
6. The Right Way to Clean the Blender Base
The blender base houses the motor and should never be submerged in water. To clean this part, first unplug the unit to ensure safety. Use a damp cloth with a mild detergent to wipe down the exterior, removing any splashes or spills. Pay attention to the control panel and buttons where residue can accumulate.
For stubborn spots, a toothbrush can be used for gentle scrubbing. Ensure that no water seeps into the motor housing, as this can cause damage. Regular cleaning of the base will keep your blender looking new and functioning properly.
7. Drying Techniques to Prevent Damage
Proper drying is as important as cleaning when it comes to maintaining your blender. After washing, use a clean, dry cloth to wipe the jar and blades thoroughly. Leave the jar upside down on a drying rack to ensure that all moisture is drained out.
For the base, use a dry cloth to remove any remaining moisture after cleaning. Ensure all parts are completely dry before reassembling the blender. This prevents mold, mildew, and odors from developing, keeping your blender in pristine condition.
8. Dealing with Stubborn Stains and Odors
Over time, blenders can develop stubborn stains and odors, especially if frequently used for strong-smelling ingredients like garlic or turmeric. To tackle this, fill the jar with a mixture of one part baking soda to two parts water and let it sit for 15 minutes. Baking soda is a natural deodorizer and stain remover.
After soaking, use the self-cleaning method with soapy water to rinse out the baking soda solution. For persistent odors, adding a slice of lemon to the cleaning process can further neutralize smells, leaving your blender fresh and ready for the next use.
9. Proper Maintenance to Extend Blender Life
Regular maintenance is key to extending the life of your blender. Apart from regular cleaning, inspect the blades periodically for signs of dullness or damage. If the blades are not performing as well as they used to, consider replacing them to ensure optimal blending.
Additionally, check the seals and gaskets for wear and tear. These components are crucial in preventing leaks and maintaining the efficiency of the appliance. By keeping an eye on these parts and addressing issues promptly, you can enjoy your blender for many years to come.
10. Popular Viral Hacks: What Works and What Doesn’t
The internet is full of viral cleaning hacks, but not all of them are effective or safe for your blender. For example, some suggest using rice to clean the blades, but this can actually dull them and cause damage. Others recommend using harsh chemicals, which can be hazardous.
Stick to tried-and-true methods, like the self-cleaning technique with soapy water. Natural solutions such as baking soda and lemon are safe and effective for dealing with stains and odors. Always prioritize the manufacturer’s guidelines when considering any cleaning hacks to ensure you’re not voiding your warranty or damaging your appliance.
11. Final Tips for Keeping Your Blender Pristine
To keep your blender in pristine condition, make cleaning a part of your routine. Don’t let residue sit for long periods, as this makes it harder to clean and can cause buildup. Immediate rinsing and regular self-cleaning cycles are simple habits that will save you time and effort in the long run.
Always handle the blades with care, avoiding direct contact to prevent injuries and preserve sharpness. Lastly, store your blender with the lid off to allow air circulation and prevent musty odors from developing. By following these tips, you can ensure your blender remains a reliable kitchen companion for years to come.


