🫙 How to Pressure Can Fresh Green Beans (Raw Pack Method)
Safe, Shelf-Stable Recipe for Crisp, Delicious Beans
Canning green beans is a classic homesteading favorite — it’s simple, affordable, and gives you jars of garden freshness all year round.
The “raw pack” method keeps beans firmer than the “hot pack” method and works great when done correctly.
Let’s go through the full safe recipe.
🧺 Ingredients
- Fresh, tender green beans (about 14 pounds for 7 quart jars, or 9 pounds for 9 pint jars)
- Boiling water (for covering the beans)
- Canning salt (optional): ½ teaspoon per pint or 1 teaspoon per quart
🧰 Equipment
- Pressure canner (NOT a water bath canner — low-acid foods require pressure)
- Mason jars (pint or quart size)
- New canning lids and clean bands
- Jar lifter, funnel, ladle, and bubble remover tool
🪴 Step 1: Prepare the Beans
- Wash the green beans thoroughly under running water.
- Snap off the ends and cut into 1–2 inch pieces.
- Discard any tough, damaged, or spotted beans.
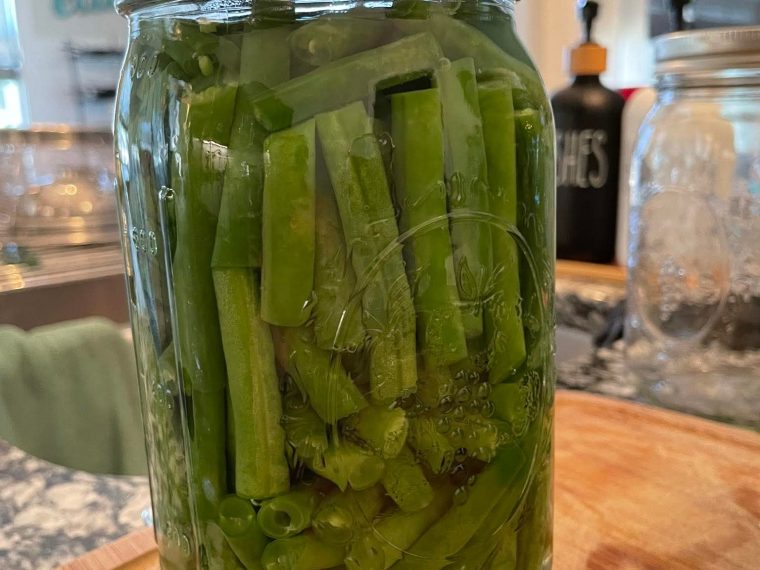
🫙 Step 2: Pack the Jars (Raw Pack Method)
- Do not pack them too tightly!
- Fill jars loosely with raw beans, leaving enough room for liquid to circulate.
- If you press them in too tightly, liquid may not penetrate evenly and food may spoil.
- Add optional salt to each jar (½ tsp for pints, 1 tsp for quarts).
- Pour boiling water over beans, leaving 1 inch of headspace at the top.
- Remove air bubbles by running a plastic utensil or bubble remover tool around the inside of the jar.
- Wipe the rims clean and apply the lids and bands (tighten to fingertip tight).
🔥 Step 3: Pressure Canning Process
For Dial-Gauge Pressure Canners:
- Pints: 20 minutes
- Quarts: 25 minutes
- Pressure: 11 PSI
For Weighted-Gauge Pressure Canners:
- Pints: 20 minutes
- Quarts: 25 minutes
- Pressure: 10 PSI (for altitudes below 1,000 ft)
- Adjust for higher altitudes:
- 15 PSI for altitudes above 1,000 ft
💡 Always check your canner’s manual for exact settings.
⏲ Step 4: Cooling and Storing
- Turn off the heat and allow the pressure to return naturally to zero — don’t rush it.
- Wait 10 more minutes before carefully removing the lid.
- Lift jars out using a jar lifter and place on a towel (do not tilt).
- Let jars cool 12–24 hours undisturbed.
- Check seals — lids should be firm and slightly concave.
🧂 Step 5: Label and Store
- Label jars with date and contents.
- Store in a cool, dark, and dry place (pantry or cellar).
- For best quality, use within 1 year.
🍽 How to Use Home-Canned Green Beans
These are perfect for:
- Quick weeknight side dishes
- Soups and casseroles
- Adding to stews or rice dishes
Just open, heat, and season — no prep needed!
⚠️ Important Safety Notes
- Always use a pressure canner, not a boiling water bath.
- Never thicken, puree, or add dairy before canning.
- If a jar doesn’t seal after 24 hours, refrigerate and use within 3–4 days.
🌿 Final Thoughts
Canning your own green beans means you’ll always have a healthy, homegrown side dish on hand. Remember:
“Loose packing, enough headspace, and correct pressure time — that’s the key to perfect, safe green beans every time.” 🌱