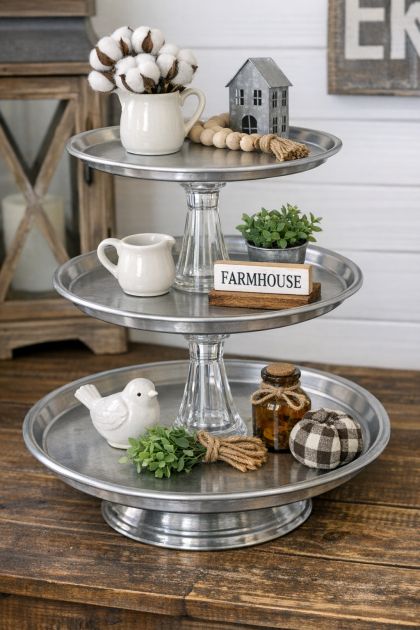
In the world of home décor, finding the perfect farmhouse-style tiered tray can be both costly and time-consuming. However, with a few simple materials, you can create your own stunning DIY farmhouse tiered tray that is both chic and functional. Whether for organizing your kitchen essentials or displaying seasonal decorations, this project is a great way to add a personalized touch to your home. By using metal pizza pans and glass candlesticks, you can create an eye-catching piece that is sure to be a conversation starter.
This DIY farmhouse tiered tray can be styled in numerous ways to suit your home decor. Place it on your kitchen counter to organize fruits, spices, or coffee supplies. Alternatively, use it as a centerpiece on your dining table or living room to showcase decorative items such as candles, small potted plants, or holiday-themed ornaments. The combination of silver metal and clear glass offers a versatile aesthetic that complements rustic, vintage, or industrial interior styles.
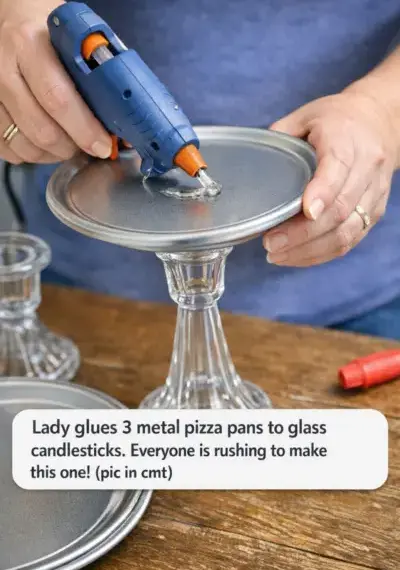
DIY Farmhouse Tiered Tray
Materials
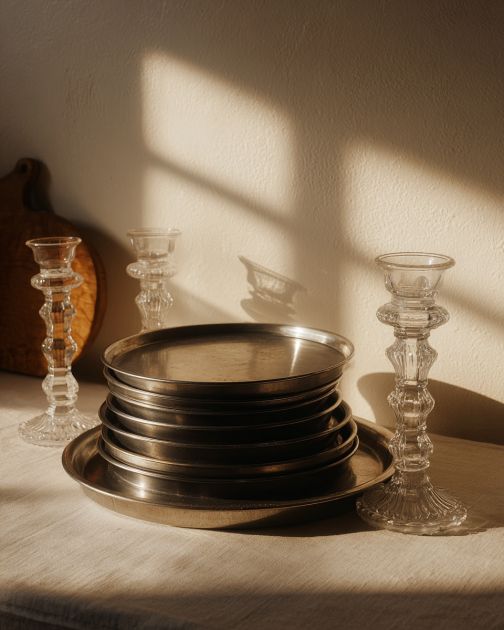
3 silver metal pizza pans (12 inches in diameter)
2 clear tapered glass candlesticks (approximately 7 inches tall)
Strong adhesive suitable for metal and glass (e.g., E6000 glue)
Ruler or measuring tape
Pencil or marker
Directions
Start by cleaning the pizza pans and candlesticks thoroughly to ensure that the adhesive will stick properly. Allow them to dry completely.
Take one of the pizza pans and mark the center using a ruler and pencil. This will help ensure that the candlestick is placed accurately.
Apply a generous amount of adhesive to the bottom of one glass candlestick and press it firmly onto the center of the first pizza pan. Allow it to dry as per the adhesive instructions.
Once the first layer is dry, apply adhesive to the top of the candlestick and attach the second pizza pan, centering it carefully.
Repeat the process by gluing the second candlestick to the center of the second pizza pan. Ensure it is secured in place.
Finally, apply adhesive to the top of the second candlestick and place the third pizza pan on top, centering it precisely. Allow the entire structure to dry completely before using.
Ensure the tray is stable and all layers are securely attached before placing any items on it.
Variations & Tips
To customize this DIY project, consider painting the pizza pans with chalk paint or spray paint in a color that matches your home décor. You could also use decorative candlesticks for added flair or swap the silver pans for copper or gold ones for a different metallic finish. For added stability, consider using epoxy resin adhesive and allowing it to cure fully. This project can also be adapted by using different sizes of pizza pans or adding a fourth layer for more display space.